Barter for Abundance

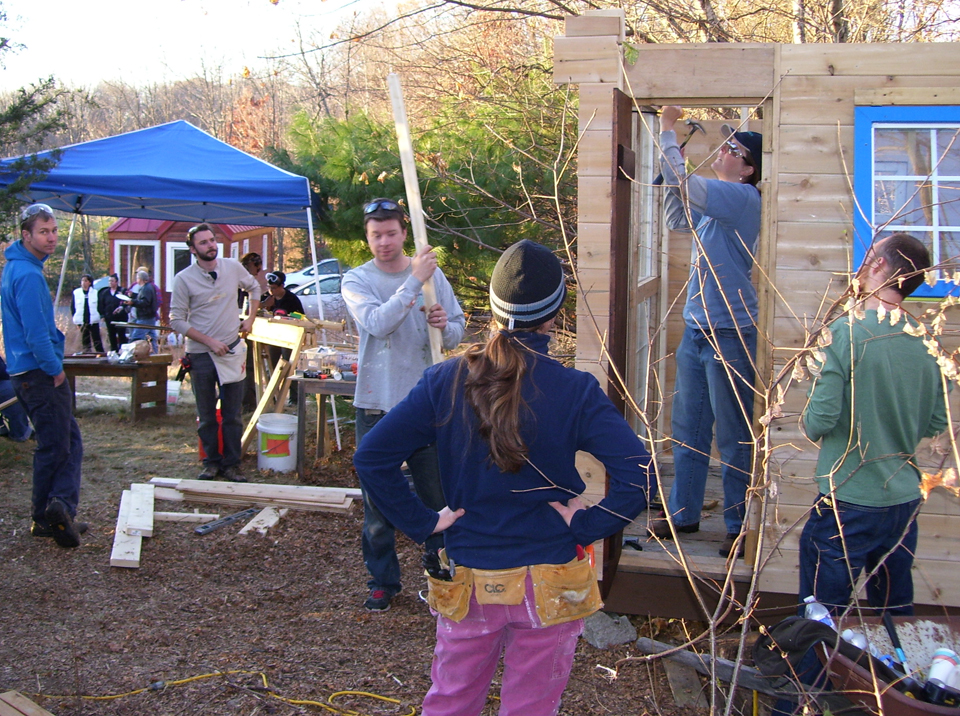
I met Libby and Tristan at a tiny house workshop in 2011 and loved their creatively built gypsy wagon, Whittled Down. I was especially fond of their “observation deck” solution for their feline.

The recent article (below) that Libby penned is full of tips on how to engage your community and reap a natural abundance.  Here are some of Libby’s resourceful ideas.

ABUNDANCE: FOOD SWAPS AND POTLUCKS

This is the time of year that conscious consumers dust off their soapboxes to proclaim the virtues of “Buying Local” for the holidays. And indeed, if you are buying things, buying them from local artisans is they way to go. But the soapbox I’m standing on this December wasn’t hand crafted out of local sustainably harvested lumber by a master carpenter, it was pulled from the dumpster behind the Goodwill. That’s right, I’m talking about the Church of Stop Shopping right here.
Let’s face it–sometimes, Buying Local can be expensive, unsustainably so. We are focused on building a life that we can maintain without having to work a combined 80 hours a week. Truth be told, we’d like to work as little as possible. That means we need to spend as little money as possible as well. We like living this way–it inspires us to be creative, and to find abundance in all the little cracks and crevices of modern life.
Lately, we’ve been revelling in the particular kind of abundance that stems from cooperation, generosity, and community. The “stuff” that you get out of this kind of abundance is extra special–you know who made it, and you know that it was made to be shared. It just feels good.
So, without further ado, I present to you two ways to enjoy this most special form of abundance while spending zero dollars and making new friends:

The Food Swap

We participated in our first formal food swap this weekend, and it knocked our socks off. Our local incarnation is called Valley Food Swap; it uses the Food Swap Network format. Basically, you bring a bunch of food items (canned, frozen, fresh produce, baked goods, you name it) to swap with everyone else who attends. It runs a bit like a silent auction–every item has its own sheet of paper where you can make a swap offer. At the end, you review your swap sheets, decide which offers look most appealing, and make your trades. Here’s a before-and-after of what we brought to the swap, and what we brought home:

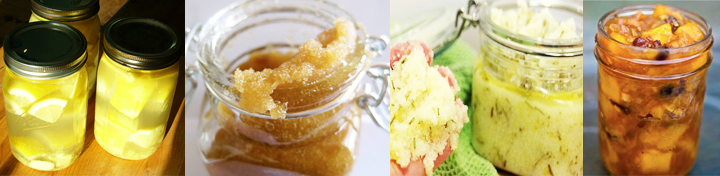
Check that out! We brought five items: spiced carrot jam, cranberry-ginger chutney, low bush blueberry jam, kimchi, and frozen pie crusts. We brought back…all this loot! The pile includes homemade caramels, an aloe plant, applesauce, hot sauce, three pints of tomatillos (who still has fresh tomatillos this time of year? wizards?), fresh eggs, and frozen pumpkin puree. We also brought back some of the stuff we brought to swap, which is great, because I wanted some of those pie crusts for my own freezer! In fact, we’ve got a chicken pot pie in the oven right now…

Some of this loot will stock our own pantry, and some of it I got to give as presents to friends and family. In addition to bringing home all this amazing food, we got to see some old friends, meet one of our new city councilors, and chat with some amazing gardeners and home preservers.The Potluck

potluck pies

Recently, we were invited to a potluck that has been held every Monday night, without exception, for over 400 consecutive Mondays. If no one will be home on a particular Monday, the hosts go so far as to leave food on the stove and a note on the door, welcoming anyone who drops by to let themselves in and feast. We had a great time at the potluck, and felt so welcome even though we only knew one or two of the over a dozen people in attendance. There was a birthday cake for a toddler. We played music by the wood stove. We discovered one is never more than one or two degrees of separation away from a common friend in this tight-knit community.

Inspired by this potluck, we decided to try holding a similar weekly event at our home a few towns over. We live in a community that can feel a little isolated from the more happening towns nearby, which makes those of us who live here form a very unique sense of camaraderie. But, it can be kind of sleepy round here. We need more places and excuses to get together.

We have had a few weekly potlucks now, and it’s been a wonderful experience. And talk about abundance! Guests have brought oysters, fancy chocolate, amazing wine, and homemade tiramisu to share. When each person brings one lovely dish, you have a first class feast on your hands.

At last week’s potluck, some guests who are a generation older than us were reminiscing about the potlucks they used to have in their neighborhood when their children were small; a rotating affair several nights a week that took the burden of cooking a big meal off of the entire neighborhood, freeing them all up to do other things.

We all decided that it’s high time for a revival of potluck culture.

Mixing Door and Window Colors

Colors.1In my Silver Bullet journal of the build I placed the formula for the custom mixed paint I am considering for my doors and windows. These are two of my favorite colors and affords me the opportunity to recycle my leftover studio materials.

Two courses I taught as a professor of art were  Color Theory 1 and 2 and The Alchemist’s Lens which explored color psychology, effects and techniques, chrome history, and the bastardization of materials or how not to play by the manufacturers rules by knowing more science than they do.

So, yes, I am painting over the exterior of my repurposed, found and purchased vinyl windows with a tested method (laborious, but the results are fantastic) that won’t crack, peel or require much maintenance. And my art studio storage unit is full of the perfect acrylic hues and polymers that will work.

As for my other reclaimed wooden windows and doors, that process is a bit more laborious. Now that I have some time during the snowstorms, frigid temps and injury recovery, I find the process quite meditative. Sand, repair, sand again, paint 3 thin layers of color with chinese brushes – sanding with sandpaper then fine steel wool between, varnish 3 layers of super spar-rubbed on only [after waiting 20 days to set]-sanding with sandpaper then fine steel wool between, then polish w/tiny amount of carnauba wax). Wicked labor intensive but hey, I can’t do any intense construction labor work with my injuries, but swathing a little paintbrush around won’t kill me!

Upperwindows.1

Upperwindows.3

Tiny House “Gone Knitting” Sign Posted

GONE KNITTING

I love trout fly fishing and knitting. Go figure. I have custom rods and custom needles. Both activities have incredible health benefits, you can find those here and here.

After MRI’s, X-rays and cortisone shots, I received my doctors now mandatory orders: two months physical therapy for my elbow (from construction overuse) AND no typing!

Totally bummed about not being able to work on the build, I found a way during the holidays, snowstorms and frigid weather to still move forward on my sustainable tiny life.

In the afternoons, after teaching my “Sustainable Lifestyle Design” classes, I would post items from storage for sale. In the evenings, I decided to engage in other sustainable practices such as preserving my famous Mango chutney, infusing vodka with lemon/ginger/honey, and creating  sugar/coconut/raw honey and lemon/salt rosemary body scrubs. So much fun and makes the house and your skin smell delicious!

Anyone have some of their own homemade stuff to barter/trade, Email me at taospirit [at] mac [dot] com!

Winterprojects

Like other tiny life enthusiasts I was anxious to creatively repurpose my, my friends and family “stuff”. I needed some great winter socks, holiday gifts, hats and scarves anyway. All these designs are mine. Not planned or written down;  just organically started, a different color here , a different kind of stitch or cable there, different texture based on what was left at my front door on a given day.

knitting

I was able to gift all the leftover sets of hats and scarves to our local Council on Aging before the holidays for those in need. I got carried away and knit another entire drawer full of socks and leg warmers for my daughter who likes to walk through the snow and woods to teach at the private academy nearby . And best of all, it provided endless hours of play for my daughter’s felines and for me, plenty of laugh therapy through the snowstorms while we await the Spring!


Repurposing of worldly goods this month: 26 cubic feet.

A little help please?

With swollen fingers and elbow I’m a hot mess and really should not have a drill put into my hands! After struggling to get the zip panels up on the dormer roof area last week and breaking a large picture window trying to lift it by myself, I set about asking for some volunteers to come up and help. Yeah, I can’t do it all alone. Darn.

Thank heavens some of Deek’s tiny house workshop enthusiasts offered to help me raise the rest of my front roof! I am psyched!

They arrive on Saturday; first chore, fishing their keys out of their car with my daughter’s creative invention: a walking pole with an empty paint roller.

Sean.keys.1

The motley crew finds the keys!

Keysfound

Although the snow squalls and chilly weather (22 degrees F) were a challenge to these tiny house enthusiasts;  they were ready to learn all about the equipment and get to work. Alicia, Sean, and Jessica were definitely a colorful and cheerful crowd swarming all over the silver bullet like busy bees.

Having broken a window earlier that morning I had Sean and Jessica help me retrofit the rough opening for a smaller one.

GableVol.4

Then we got busy returning to securing the upper framing and roof rafters.

Rafters.1

GableVol.3

Sean starts work with me on an upper window rough opening while I get some rafters secured with hurricane ties.GableVol.1

GableVol.2

Our “silicone queen” sealed up the small gap between framing and the double wheel cover.

GableVol.5

“I’m cold, you got anything to cover my legs?”, quips Alicia. My daughter, Belle, offered up the leg warmers I knit for her.

legwarmers

We were able to get some more rafters attached, complete the retrofit window rough opening, do the window flashing, silicone axle cushioning and zip panel cutting just as the snow took over!

And can you believe it? They are coming back next week for more! And I get to taste Alicia’s shepherd’s pie! Yummy!

Up on the Roof

Now that the ridge beam is up, I am ready to design the rafters for the back and front roofing. I did my rafter research a year ago and forgot about the complex math in rafter calculation. After looking at all the formulas necessary I totally freaked out. Even though I was a math wiz in college (which was useful for all the golden ratio artwork I did during my art career), I really wanted my house to be an organic experience, like nature, in the “now”, Tolle style.

My intent from the beginning was to approach the silver bullet tiny house build differently than most of my fellow enthusiasts.  Of course I want the build to have some structure (respect for safety, building codes, engineering, necessary customized features, off-grid, small footprint, etc.); however, I wanted the experience and myself to “imprint” each other. You know, the “what is a home”, really, question materialized and honored by my animus.

I decided to approach this project as I did a body of artwork for a show. I had ideas, concepts, a palette and media materials in mind; yet, I wanted to hold the greatest respectful space for my intuitive, accidental inflection, and creativity. Yes, I knew that might mean some delays, some changes and some challenges, and that’s okay with me.

To meet my challenge of building an organic tiny house (no formally purchased plans from a “big-box” tiny house company), no architect boyfriend or contractor relative handy, just a few outside sketches, some found ecologically recycled and repurposed materials and a list of necessary features. I constructed an entire rafter template plan based on my back end framing using a basic framing square. Luckily the rafters all fit beautifully on the dormer area. Whew!

Dormerrafters


You can see the dormer rafters in this picture above the head of one my sponsors who came from France to visit my progress on the Silver Bullet.


Over a glass of French wine late that night I was thinking, “I’ll have to ask if she’ll help me with those gigantic ZIP panels…”. Her plane left too early. Ah, maybe the UPS guy?

Dormer

As you can see from these pictures above, I chose to have an eave to hide the gutter water collection system I will install later. Take care that you have measured this properly so it fits within the width guidelines and wind aerodynamics of traveling on the road. I chose to give up a few interior inches on each side of my trailer’s width in order for water collection/filtration to become part of my permanent off-grid collection system.

Mystery, Mayhem and Misadventures on a Tiny House Build

Hi everyone. It’s been three months. No mystery really, Tiny House sh* happens. Macy Miller broke her back building her tiny house.

The misadventure began in November and December, I sustained three injuries; two fingers on my left hand have been in plastic casts and my right arm in a sling for months. And after nursing my daughter through two weeks of H1N1 in January, I decided to slow down and take a much needed vacation from “the build” to heal until Spring.

Now that I can type again, I’ll be posting a bunch of blog entries I would have made in the next 24 hours so you can catch up. Okay, so I couldn’t hold a drill or a hammer without intense pain or further injury; but if you know me, I can’t sit creatively still for long. With my physician’s and physical therapists help though, you can see what mayhem I did get up to this winter!

For those of you who want the details: While framing my walls and lofts, I smashed and shattered my left index finger distal phalange (tip) with a hammer. Then on a cold day while working on my roof with some volunteers, my drill got caught in some cut-off glove threads and drilled a hole through my left thumb nail to the bone.

And, my right arm suffered severe tennis elbow due to overuse of my extensor tendons connected to my lateral epicondyle from too much impact drilling, lifting, sawing and hammering by myself. I hope the therapy works, because the operation required is no fun.

Lesson learned: You cannot do a tiny house outside in nature all by yourself after work and on weekends in just 6 months on a limited budget. No matter how much you plan, expect delays due to weather, injury, construction material and building glitches.

Sometimes you have to let go, roll with the punches, make lemonade out of lemons, and go with the flow.

But here’s the thing, it’s all good. Taking risks, like this challenging dream, is what life’s all about!

The 2nd Workshop with Deek

Just one year ago I attended Deek’s relax shacks tiny structure workshop; more here. This last weekend I had the opportunity to speak at and attend his new format workshop. It was well organized. Two structures bases’ were already completed and thus the group was able to be more involved in learning building skills and realizing the completion of a project.

After all, you really cannot effectively have more than 4 people in, around and about a tiny structure and work productively.

There were more materials, more construction “stations”, a greater camping area, etc. I only wish I could have been there longer to enjoy all the interesting participants. Please do NOT hesitate to sign up for his next one!

Deek.2.2

One of Deek’s shacks I toured in his yard.

Deek.2.4

Drew, one of my fellow tiny house enthusiast’s from last year’s workshop is standing inside our project from the workshop.

Deek.2.5A second structure that I understand will have a tufted transparent roof.

Deek.2.3

Deek.2.1

The Lofts

This week the build out for one of my lofts was required so that the ridge beam and rafters can be built from the inside out.

First I had to insulate and EcoFoil the exterior floor over the deck.

Loft.3
Loft.4

I have chosen to “pickle” the boards with white primer and two layers of acrylic varnish to allow the woods lovely surface that ethereal aesthetic finish which will be featured throughout the tiny house interior. Just enough to tone down the busyness of the wood yet still leave an appreciation of its surface qualities.

Loft.5

The underside of the loft boards were also sanded and given the same finish where they will be visible.

Loft.2

Framing By Myself, Part 3

This was one of those days where I realized I think I bit off more than I could chew by suggesting in Deek’s workshop last year that a “building it alone challenge” for a women in her 60’s wouldn’t be too difficult. And I have no building, design or construction experience either. I started with a Dewalt drill.

This project was to serve as a model to everyone that they could build an off the grid, debt-free, ecologically friendly tiny house with a bit of gumption, creativity and a passion for the sustainable tiny life. So I just bit my lip and remembered the NIKE ad, “Just do it!”

Sheathing.1

I had an inkling that the future would hold a few more of these internal pep talks.

Sheathing.2Now for taping the seams with ZIP tape which I found out was a very sticky job.

Sheathing.3

Now for the first “topping out” ceremony – an homage to the construction Gods and Goddesses!

Sheathing.4

*Note: the names you see written all over the house are donors that made contributions to the Silver Bullet Indiegogo Tiny House Campaign in August, 2013 (small funding to frame the exterior).

Framing By Myself, Part 2

After a week of rainy weather, I was able to erect the double door framing and start the front area. My top five reasons for using ZIP panels for sheathing:

1. Their product and manufacturing is sustainable.

2. It’s a company that treats its people ethically.

3. The organization gives back to the communities in which it is located.

4. Added structural durability, superior moisture protection, and enhanced thermal protection.

5. Decreases installation time considerably.

Framing.2

Framing.1

* Note: All 2×4’s, 2×6’s and 2×8’s are SFI Certified Wood.