A little help please?

With swollen fingers and elbow I’m a hot mess and really should not have a drill put into my hands! After struggling to get the zip panels up on the dormer roof area last week and breaking a large picture window trying to lift it by myself, I set about asking for some volunteers to come up and help. Yeah, I can’t do it all alone. Darn.

Thank heavens some of Deek’s tiny house workshop enthusiasts offered to help me raise the rest of my front roof! I am psyched!

They arrive on Saturday; first chore, fishing their keys out of their car with my daughter’s creative invention: a walking pole with an empty paint roller.

Sean.keys.1

The motley crew finds the keys!

Keysfound

Although the snow squalls and chilly weather (22 degrees F) were a challenge to these tiny house enthusiasts;  they were ready to learn all about the equipment and get to work. Alicia, Sean, and Jessica were definitely a colorful and cheerful crowd swarming all over the silver bullet like busy bees.

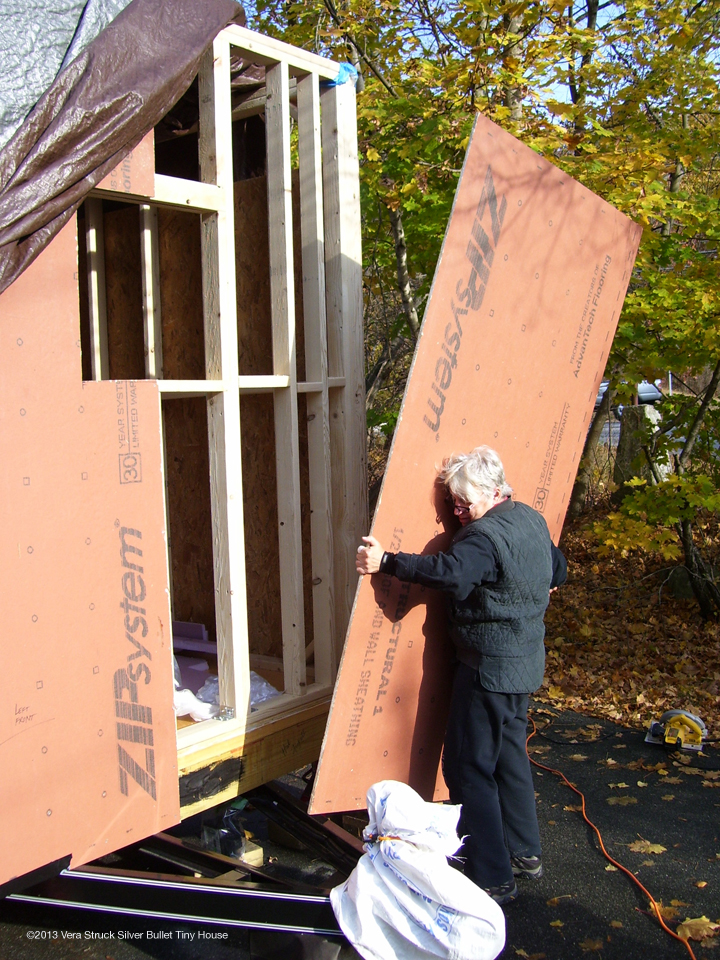
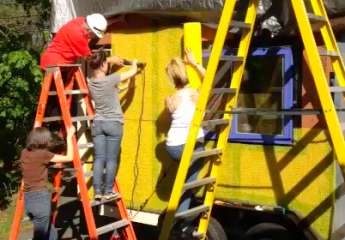
Having broken a window earlier that morning I had Sean and Jessica help me retrofit the rough opening for a smaller one.

GableVol.4

Then we got busy returning to securing the upper framing and roof rafters.

Rafters.1

GableVol.3

Sean starts work with me on an upper window rough opening while I get some rafters secured with hurricane ties.GableVol.1

GableVol.2

Our “silicone queen” sealed up the small gap between framing and the double wheel cover.

GableVol.5

“I’m cold, you got anything to cover my legs?”, quips Alicia. My daughter, Belle, offered up the leg warmers I knit for her.

legwarmers

We were able to get some more rafters attached, complete the retrofit window rough opening, do the window flashing, silicone axle cushioning and zip panel cutting just as the snow took over!

And can you believe it? They are coming back next week for more! And I get to taste Alicia’s shepherd’s pie! Yummy!

Framing By Myself, Part 3

This was one of those days where I realized I think I bit off more than I could chew by suggesting in Deek’s workshop last year that a “building it alone challenge” for a women in her 60’s wouldn’t be too difficult. And I have no building, design or construction experience either. I started with a Dewalt drill.

This project was to serve as a model to everyone that they could build an off the grid, debt-free, ecologically friendly tiny house with a bit of gumption, creativity and a passion for the sustainable tiny life. So I just bit my lip and remembered the NIKE ad, “Just do it!”

Sheathing.1

I had an inkling that the future would hold a few more of these internal pep talks.

Sheathing.2Now for taping the seams with ZIP tape which I found out was a very sticky job.

Sheathing.3

Now for the first “topping out” ceremony – an homage to the construction Gods and Goddesses!

Sheathing.4

*Note: the names you see written all over the house are donors that made contributions to the Silver Bullet Indiegogo Tiny House Campaign in August, 2013 (small funding to frame the exterior).

Framing By Myself, Part 2

After a week of rainy weather, I was able to erect the double door framing and start the front area. My top five reasons for using ZIP panels for sheathing:

1. Their product and manufacturing is sustainable.

2. It’s a company that treats its people ethically.

3. The organization gives back to the communities in which it is located.

4. Added structural durability, superior moisture protection, and enhanced thermal protection.

5. Decreases installation time considerably.

Framing.2

Framing.1

* Note: All 2×4’s, 2×6’s and 2×8’s are SFI Certified Wood.

Tiny House Framing by Myself

The IndieGoGo Campaign funds in hand, I began the daunting task of framing the walls. I completed this in parts as I am building the Silver Bullet myself without a team of volunteers or friends so my choices reflect the challenge I made in Deek’s workshop almost a year ago.

1. I started with the rear of the tiny house.

Walls.1

2. Here’s the back view.

Walls.2

3. Sheathing and insulating as I went. Again, I used the same recycled blue jean insulation as I did on the floor with a layer of EcoFoil and 3/4-1″ space before any exterior or interior top layer.

Deck.5

* Note: All 2×4’s, 2×6’s and 2×8’s are SFI Certified Wood.